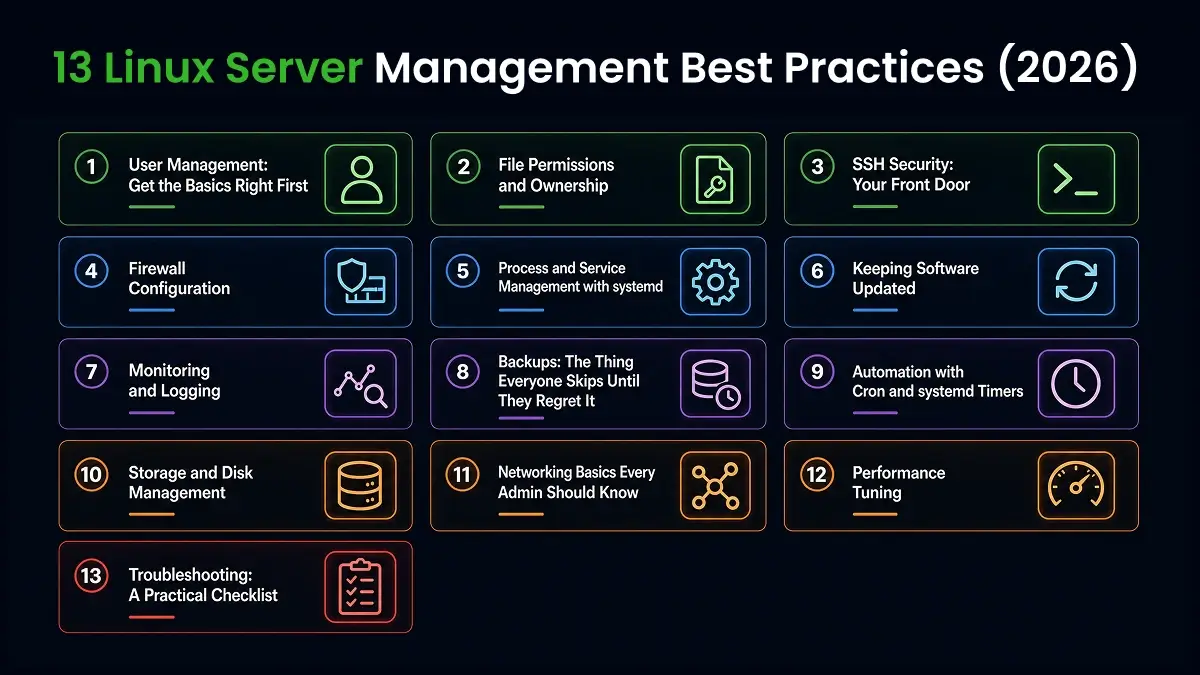

The 13 most important Linux server management best practices in 2026 are: creating individual user accounts with least-privilege sudo access, setting correct file permissions (never chmod 777), disabling root SSH login and switching to key-based authentication, configuring firewalls with deny-by-default rules, automating security updates, managing services with systemd, centralizing monitoring and alerting, testing backup restores monthly, automating repetitive tasks with cron or systemd timers, managing disk and storage proactively, knowing core networking diagnostics, tuning performance baselines, and following a structured troubleshooting checklist.
These practices apply to any Linux distribution - Ubuntu, Debian, RHEL, CentOS, or Fedora - and cover the full lifecycle from initial setup to ongoing maintenance.
Overview of Best Practices of Linux Server Management
Before deep-diving into each recommendation, here is a high-level summary of the essential rules for modern sysadmins. The table below lists each practice in order of priority, along with the key commands and the consequences of neglecting them.
| Practice | Priority | Key Command/Action | What Goes Wrong Without It |
|---|---|---|---|
| Individual user accounts | Day 1 | useradd -m -s /bin/bash | Lost audit trail, shared root passwords |
| File permissions | Day 1 | chmod 644 / chmod 755 | Malicious script uploads via 777 |
| SSH hardening | Day 1 | PermitRootLogin no + key auth | Brute-force compromise through port 22 |
| Firewall (deny-by-default) | Day 1 | ufw default deny incoming | Every open port is an attack surface |
| Automated updates | Week 1 | unattended-upgrades | Known CVEs exploited months after patches |
| systemd management | Week 1 | systemctl status/restart | Stale services, missed boot starts |
| Monitoring and logging | Week 1 | journalctl + alerting stack | Disk fills to 100%, users find the problem first |
| Tested backups | Week 1 | rsync/restic + monthly restore test | Corrupted backup discovered during an actual outage |
| Cron / systemd timers | Month 1 | crontab -e or .timer units | Manual tasks skipped, log rotation forgotten |
| Disk management | Ongoing | df -h + du -sh + logrotate | Services crash from full disk at midnight |
| Network diagnostics | As needed | ip addr, ss -tulnp, dig | Chasing the wrong problem for hours |
| Performance tuning | As needed | vm.swappiness, file limits | Unnecessary swapping, connection drops |
| Troubleshooting checklist | As needed | Logs > resources > service > network > changes | Random fixes that create new problems |
The 13 Linux Server Management Best Practices
Let's explore all 13 Linux server management best practices one by one.
1. User Management: Get the Basics Right First
Before you even think about hardening SSH or configuring a firewall, get your user accounts in order.
A huge chunk of server compromises happen not because of some exotic zero-day, but because of sloppy account hygiene - shared root passwords, ex-employees who still have access, or a service account with way more privilege than it needs.
Create individual accounts, not shared logins
Every person (and every application, where practical) should have their own account. Shared logins destroy your audit trail - if three people share one account and something breaks, you have no idea who did it.
# Create a new user with a home directory
sudo useradd -m -s /bin/bash username

# Set a password for them
sudo passwd username
-m creates the home directory, -s /bin/bash sets their default shell. If you skip -m, the user won't get a home directory, which trips people up more often than you'd expect.
Grant sudo instead of handing out root
Add trusted users to the sudo (Debian/Ubuntu) or wheel (RHEL/CentOS/Fedora) group instead of giving them the root password.
sudo usermod -aG sudo username        # Debian/Ubuntu
sudo usermod -aG wheel username       # RHEL/CentOS
For finer control, edit sudoers with visudo (never edit /etc/sudoers directly - a syntax error there can lock everyone out):
sudo visudoYou can restrict a user to specific commands only:
username ALL=(ALL) NOPASSWD: /usr/bin/systemctl restart nginxThis lets username restart nginx without a password, but nothing else. This is the kind of least-privilege thinking that should run through everything you do as an admin - give people exactly what they need, no more.
Clean up after people leave
This one's overlooked constantly. When someone leaves the team, lock or delete their account the same day.
To temporarily or permanently lock access without deleting their data:
sudo usermod -L username                         # Disables password login
sudo usermod -s /usr/sbin/nologin username        # Disables SSH shell access
sudo mv /home/username/.ssh/authorized_keys /home/username/.ssh/authorized_keys.bak  # Disables active SSH keys
To delete the user and their home directory (and thus all SSH keys) entirely:
sudo userdel -r usernameBefore deleting, check for cron jobs or running processes tied to that user (crontab -u username -l, ps -u username), so you don't accidentally kill something important.
Bottom line: For teams managing multiple servers, keeping track of who has access to what becomes exponentially harder as you add servers. A centralized server directory with access management replaces the manual authorized_keys audit on every individual machine.
2. File Permissions and Ownership
Linux permissions trip up beginners constantly, but they're really not that complicated once they click.
The permission model
Every file has three permission sets: owner, group, and others. Each set can have read (r), write (w), and execute (x).
ls -l /var/www/html/index.html-rw-r--r-- 1 www-data www-data 1024 Jul 10 09:15 index.htmlReading left to right: it's a regular file (-), the owner can read/write, the group can read, and everyone else can read.
Changing ownership and permissions
sudo chown www-data:www-data /var/www/html/index.html   # change owner:group
sudo chmod 644 /var/www/html/index.html                 # rw- r-- r--
sudo chmod 755 /usr/local/bin/deploy.sh                  # rwx r-x r-x (executable script)
A quick way to think about numeric permissions: 4 = read, 2 = write, 1 = execute. Add them up per group. 644 means owner gets 6 (4+2 = read+write), group and others get 4 (read only).
Avoid the temptation of chmod 777
If you've ever hit a permission error and just thrown chmod -R 777 at the problem to make it go away - you're not alone, but stop doing that. 777 means anyone on the system can read, write, and execute the file.
On a web server, that's practically an invitation for someone to upload a malicious script. Figure out the actual owner/group mismatch instead. If you would rather not work out the octal, the CtrlOps File Manager sets modes from a Permissions dialog.
Special permissions worth knowing
SUID (chmod u+s): runs a file with the owner's privileges rather than the caller's. passwd uses this so regular users can update their password, which touches root-owned files.
SGID (chmod g+s): on directories, new files inherit the directory's group - handy for shared team folders.
Sticky bit (chmod +t): on directories like /tmp, it means only the file's owner can delete it, even if others have write access to the directory.
chmod +t /shared/uploads3. SSH Security: Your Front Door
SSH is how you access almost everything on a remote Linux server, which makes it the single most important thing to lock down. Most automated attacks against Linux servers are just bots hammering port 22 with common username/password combinations.
Disable root login over SSH
Nobody should be able to SSH in directly as root. Force people to log in as themselves and use sudo.
Edit /etc/ssh/sshd_config:
PermitRootLogin noSwitch to SSH key authentication
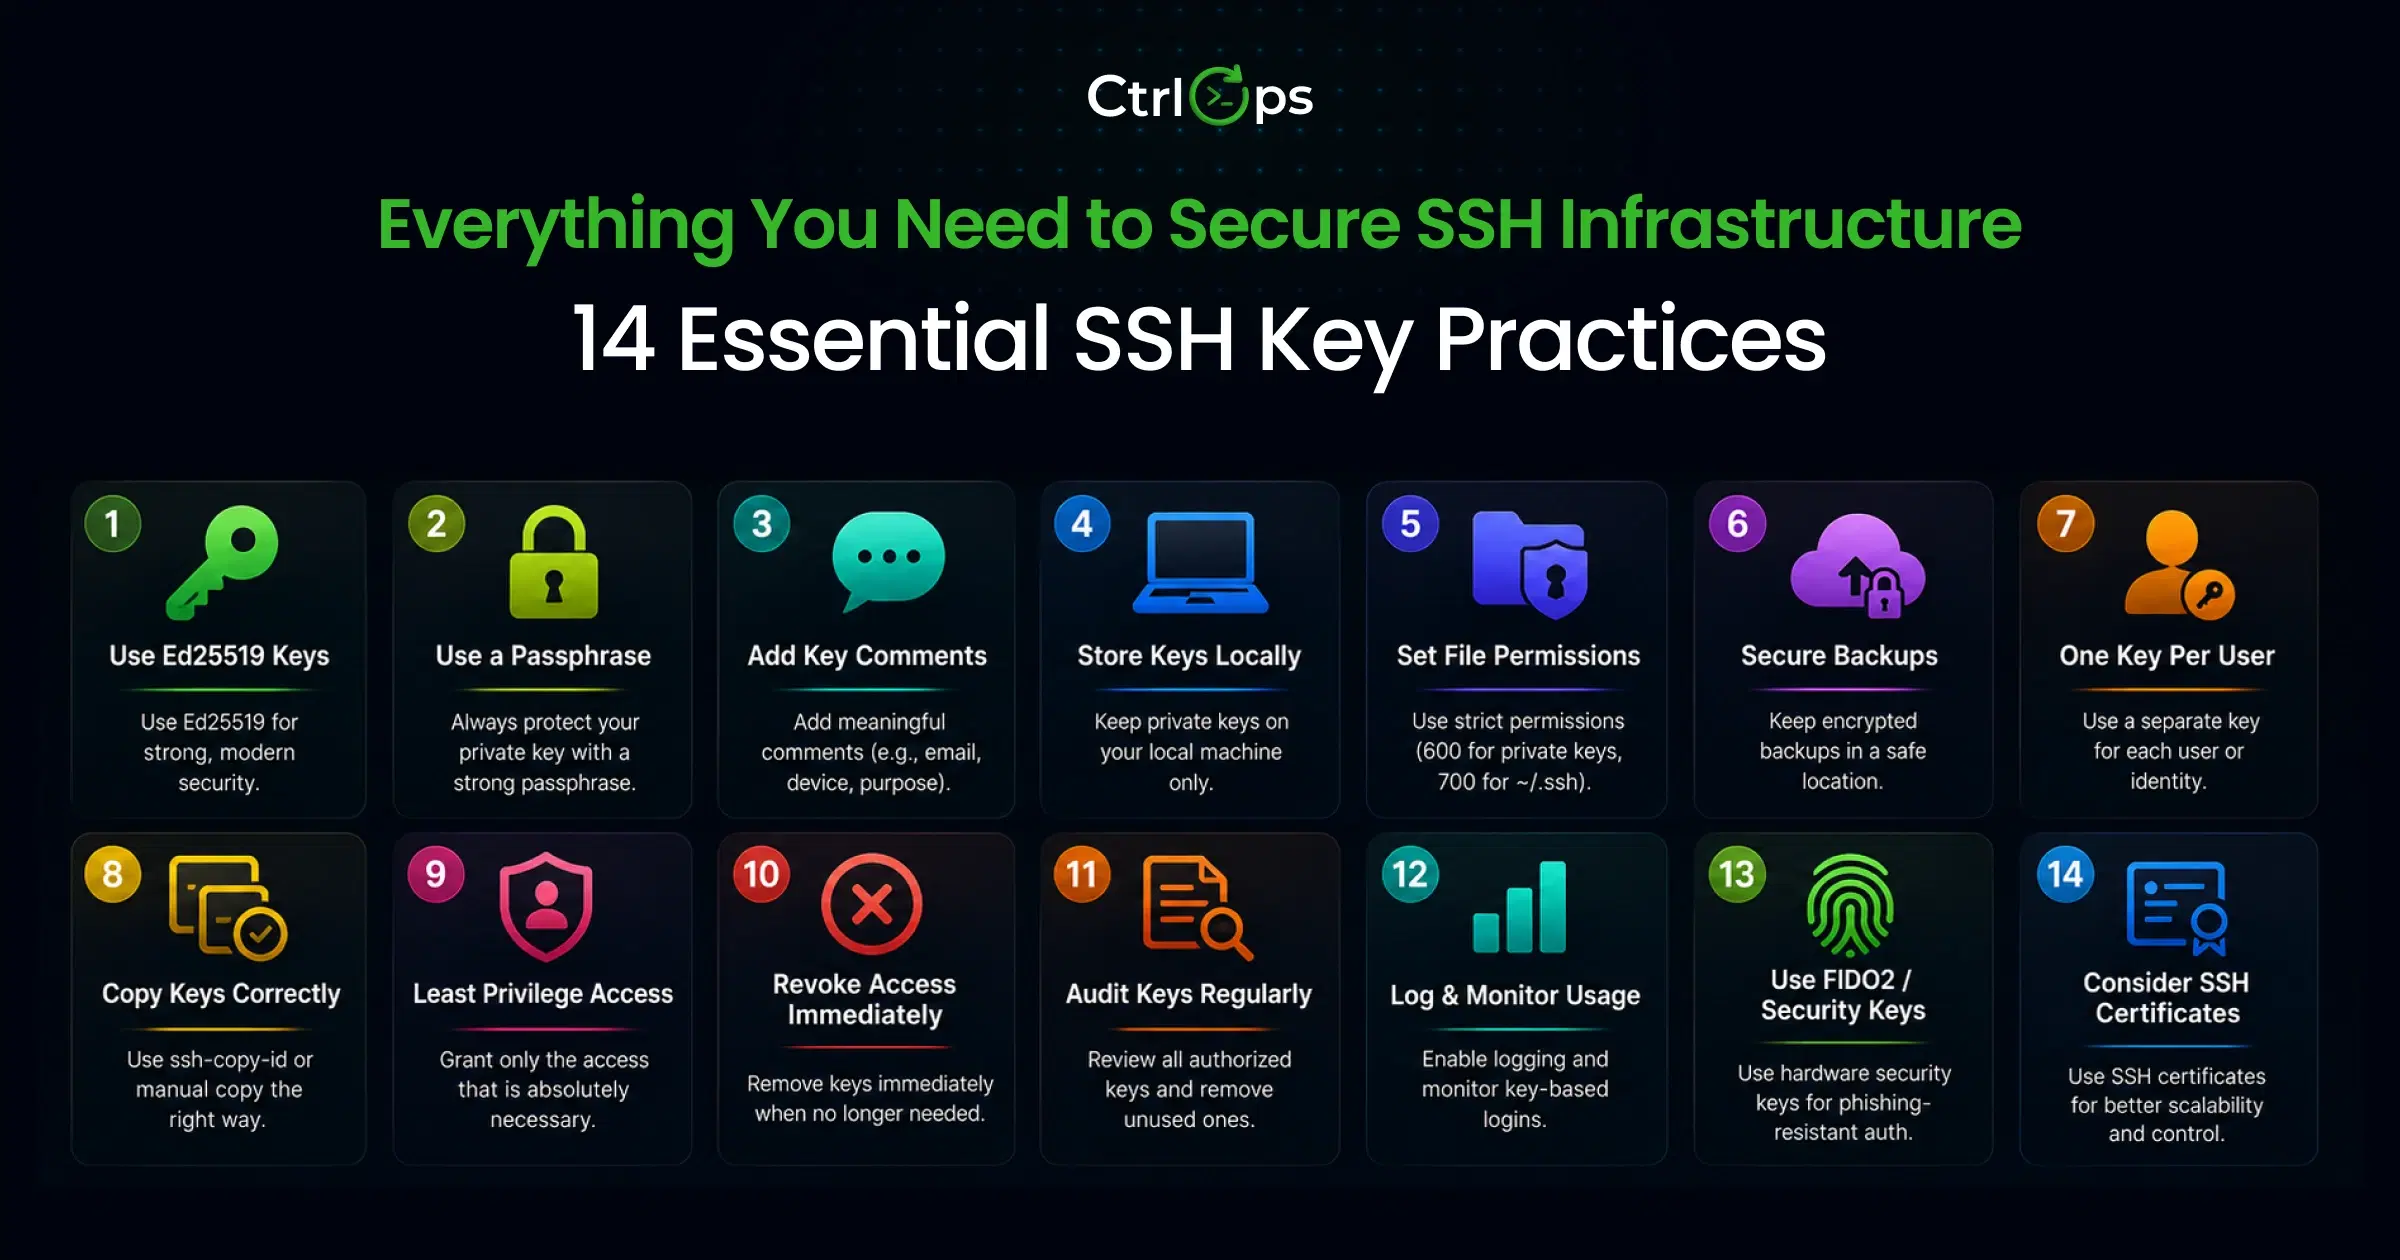
Passwords can be guessed or brute-forced. Key pairs are far harder to crack - a typical RSA or ed25519 key is effectively unguessable.
Generate a key pair on your local machine:
ssh-keygen -t ed25519 -C "username@work-laptop"Copy it to the server:
ssh-copy-id username@your-server-ipThen disable password authentication entirely on the server side, in /etc/ssh/sshd_config:
PasswordAuthentication no
PubkeyAuthentication yes
Don't restart SSH yet - apply the remaining hardening steps below first, then restart once at the end.
Other SSH hardening steps
Limit who can connect:
AllowUsers usernameUse fail2ban to automatically ban IPs after repeated failed login attempts:
# Debian/Ubuntu
sudo apt install fail2ban -y

# RHEL/CentOS/Fedora (needs EPEL first)
sudo dnf install epel-release -y
sudo dnf install fail2ban -y

sudo systemctl enable --now fail2ban
Installing it is not the same as it working. A running Fail2Ban with an empty jail list reports itself healthy and blocks nothing, which is one of the cases the logging and monitoring audit checklist checks for, alongside log rotation health and the failed-login count that tells you whether the bans are keeping up.
Set idle timeouts so forgotten sessions don't stay open forever:
ClientAliveInterval 300
ClientAliveCountMax 2
Now restart SSH to apply all the changes above:
sudo systemctl restart sshdReality check: Test your key-based login in a second terminal window before closing your current session. If something's misconfigured and you lock yourself out, you'll be glad you kept the original session open.
Optional:
Change the default SSH port. Some admins move SSH off port 22 to reduce automated scan noise (bots hammering 22 with credential-stuffing attempts).
This is "security through obscurity"; it doesn't stop a targeted attacker, only cuts down junk traffic, and it adds setup steps: on RHEL/CentOS/Fedora with SELinux enforcing, you'll need sudo semanage port -a -t ssh_port_t -p tcp <port>, your firewall rules need updating, and fail2ban needs its jail's port value changed to match.
Skip this unless you specifically want the reduced noise; the practices above (key-only auth, fail2ban, deny-by-default firewall) already cover the real security.
To check all of this in one pass, the SSH & access checklist lists every check with the command to run it, and CtrlOps Security Audit runs them over SSH and gives the server a hardening score.
For a deeper walkthrough of key generation, rotation, and revocation across a multi-server fleet, read our SSH key management best practices, or compare the best SSH clients for Mac and the best SSH clients for Linux to see how they handle key management.
4. Firewall Configuration
A firewall is your gatekeeper - it decides what traffic is even allowed to reach your server in the first place.
UFW (Uncomplicated Firewall) - Debian/Ubuntu
sudo ufw allow 22/tcp      # allow your custom SSH port
sudo ufw allow 80/tcp        # HTTP
sudo ufw allow 443/tcp       # HTTPS
sudo ufw enable
sudo ufw status verbose
Example output:
Status: active

To                         Action      From
--                         ------      ----
22/tcp                   ALLOW       Anywhere
80/tcp                     ALLOW       Anywhere
443/tcp                    ALLOW       Anywhere
firewalld - RHEL/CentOS/Fedora
sudo firewall-cmd --permanent --add-service=ssh
sudo firewall-cmd --permanent --add-service=http
sudo firewall-cmd --permanent --add-service=https
sudo firewall-cmd --reload
sudo firewall-cmd --list-all
If you changed SSH to a custom port, replace --add-service=ssh with --add-port=<your-port>/tcp; the ssh service definition only opens port 22.
The golden rule: deny by default
Only open ports you actually need. If you're not running a mail server, there's no reason port 25 should be open. Every open port is one more thing an attacker can probe.
Need to reach a database or an admin panel that should never be public? Use an SSH tunnel instead of opening its port. CtrlOps Port Forwarding saves the tunnel as a named forward you start in a click.
Getting the rules right on day one is the easy half. The network security audit checklist covers what to re-check later, including the one gap these commands cannot close: a Docker container publishing on 0.0.0.0 reaches the internet regardless of what ufw status says. On a host running containers, pair it with the Docker network and supply chain checklist, which reads the same problem from the container side and names the port bindings that slip past the firewall.
sudo ufw default deny incoming
sudo ufw default allow outgoing
Bottom line: A properly configured firewall combined with SSH key auth eliminates the overwhelming majority of automated attack attempts. Together, these two practices are the highest-ROI security steps for any Linux server.
5. Keeping Software Updated
Unpatched software is one of the most common ways servers get compromised - often through vulnerabilities that were publicly disclosed and patched months earlier.
Debian/Ubuntu
sudo apt update              # refresh package index
sudo apt upgrade -y          # install available updates
sudo apt autoremove -y       # clean up unused dependencies
RHEL/CentOS/Fedora
sudo dnf check-update
sudo dnf upgrade -y
Automate security updates
You shouldn't need to remember to patch every server manually. On Ubuntu, unattended-upgrades handles this for you:
sudo apt install unattended-upgrades
sudo dpkg-reconfigure --priority=low unattended-upgrades
On RHEL-based systems, dnf-automatic does the same job:
sudo dnf install dnf-automatic
sudo systemctl enable --now dnf-automatic.timer
For production systems, consider applying security patches automatically but holding off on full version upgrades until you've tested them in staging. A patched CVE protects you immediately. A kernel upgrade that breaks your application creates a new incident.
Installing the tool is not the same as it running. The system updates audit checklist covers what to verify afterwards: whether the periodic run is actually switched on, whether dnf-automatic is set to install rather than just notify, and whether the kernel you patched has been rebooted into yet.
Reduce your attack surface
Uninstall anything you're not using. That old FTP server nobody remembers installing three years ago is still a door into your system.
# List installed packages
dpkg -l                      # Debian/Ubuntu
rpm -qa                      # RHEL/CentOS

# Remove something you don't need
sudo apt purge telnet
Also check which services are actually listening:
sudo ss -tulnpThis shows every listening port and the process behind it - a good way to spot something that shouldn't be running.
6. Process and Service Management with systemd
Almost all modern distributions use systemd to manage services. Getting comfortable with systemctl and journalctl will save you a lot of guesswork.
sudo systemctl status nginx        # check if a service is running
sudo systemctl start nginx
sudo systemctl stop nginx
sudo systemctl restart nginx
sudo systemctl enable nginx        # start automatically on boot
sudo systemctl disable nginx
Example status output:
● nginx.service - A high performance web server
   Loaded: loaded (/lib/systemd/system/nginx.service; enabled)
   Active: active (running) since Thu 2026-07-30 08:12:03 UTC; 2h ago
Checking processes and resource hogs
top          # live view of CPU/memory usage
htop         # nicer, interactive version (install separately)
ps aux | grep nginx     # find a specific process
If a process is misbehaving and won't respond to a normal stop:
sudo kill -15 <PID>     # graceful shutdown request
sudo kill -9 <PID>      # force kill, last resort
Always try -15 (SIGTERM) before -9 (SIGKILL) - it gives the process a chance to close files and clean up properly instead of dying mid-write.
7. Monitoring and Logging
You can't fix what you don't know is broken. Monitoring isn't optional - it's how you catch problems before your users do.
Watching resource usage
df -h            # disk space by filesystem
du -sh /var/log  # size of a specific directory
free -h          # memory usage
uptime           # load average over 1, 5, 15 minutes
Example df -h output:
Filesystem      Size  Used Avail Use% Mounted on
/dev/sda1        50G   38G   10G  80% /
At 80% usage, it's time to start paying attention. Waiting until you hit 100% means services start crashing.
Centralize and review your logs
Most system logs live in /var/log, and journalctl gives you a unified view for systemd-managed services:
sudo journalctl -u sshd --since "1 hour ago"
sudo tail -f /var/log/auth.log     # watch authentication attempts live
Watching auth.log (Debian/Ubuntu) or /var/log/secure (RHEL) for repeated failed login attempts is one of the simplest ways to catch a brute-force attempt in progress.
On a host running Nginx or Apache, check that the web server logs exist as well as the system ones. The web server logging checklist covers the three ways they quietly stop being useful: access_log off left on a route, a rotation that renamed the file without telling the server to reopen it, and log files readable by every account on the box.
Set up real alerting
Manually checking logs doesn't scale. For anything beyond a couple of servers, use a monitoring stack - something like Prometheus + Grafana, Netdata, or Zabbix - so you get alerted the moment CPU spikes, disk fills up, or a service goes down, instead of finding out from an angry customer.
Set alert thresholds before the problem becomes critical. An alert at 90% disk usage is useful. An alert at 100% is just a postmortem. If a full monitoring stack is more than you need, CtrlOps Cron Jobs has ready-made alert templates for exactly these: high CPU, low disk space, and a stopped service, sent to Slack, Telegram, or a webhook.
Reality check: Most small teams skip monitoring because setting up Prometheus + Grafana feels like a project in itself. The result is finding out about disk at 100% from a customer ticket, not from your own systems. If you're managing multiple servers, a built-in monitoring dashboard eliminates the setup overhead entirely.
8. Backups: The Thing Everyone Skips Until They Regret It
If there's one practice that separates a professional setup from an amateur one, it's backups that are actually tested. A backup you've never tried restoring is a backup you don't actually have.
The 3-2-1 rule
Keep 3 copies of your data, on 2 different types of storage, with 1 copy off-site. This protects you against hardware failure, ransomware, and simple human error (like an accidental rm -rf).
The difference between syncing and backing up
A common mistake is using a simple mirror as a backup. For example:
# WARNING: This is a mirror, not a true backup!
rsync -avz --delete /var/www/ backup-server:/backups/www/
-a preserves permissions and timestamps, -v is verbose, -z compresses during transfer, and --delete removes files on the destination that no longer exist on the source.
While this mirrors the live data, it does not protect against ransomware or accidental deletion (rm -rf). If your files are encrypted by ransomware or deleted, the next run of this command will faithfully delete or overwrite the healthy backups on the destination.
Implementing versioned backups
To be truly protected, your backups must be versioned (containing point-in-time snapshots). Here are two ways to achieve this:
Option A: Versioned rsync with --backup-dir
You can tell rsync to move deleted or modified files into a dated directory instead of deleting them:
# Get the current date
CURRENT_DATE=$(date +%Y-%m-%d_%H-%M-%S)

# Sync to the main folder, moving any changed/deleted files to a dated archive
rsync -avz --delete --backup --backup-dir=/backups/archive/$CURRENT_DATE /var/www/ backup-server:/backups/current/
This ensures you can always recover older versions of modified or deleted files from the dated archive directories.
Option B: Dedicated backup tools (Restic/Borg)
For production environments, use dedicated backup tools that support deduplication, encryption, and native snapshotting. For example, using Restic:
# Initialize a restic repository
restic init --repo /srv/restic-repo

# Create a snapshot backup
restic -r /srv/restic-repo backup /var/www

# List snapshots (points in time you can restore)
restic -r /srv/restic-repo snapshots
Database backups
mysqldump -u root -p mydatabase > mydatabase_backup.sql
pg_dump mydatabase > mydatabase_backup.sql   # for PostgreSQL
Automate it and actually test restores
Schedule backups with cron (more on that below), but the part people skip is verifying the backup actually works. Once a month, pull a backup and restore it somewhere isolated. It's uncomfortable to spend time on something that "should just work," but discovering a corrupted backup during an actual outage is far worse.
Bottom line: Writing backup scripts with retention policies and verification logic is tedious, which is exactly why it stays in the backlog until data is lost. Tools that handle automated backup scheduling with configurable retention remove the friction that keeps teams from doing this on Day 1.
9. Automation with Cron and systemd Timers
Manual, repetitive tasks are where mistakes creep in. Automate anything you do more than a couple of times.
Cron
crontab -eExample: run a backup script every night at 2 AM:
0 2 * * * /usr/local/bin/backup.sh >> /var/log/backup.log 2>&1The five fields are minute, hour, day-of-month, month, and day-of-week (our cron expression generator builds and explains them). 2>&1 redirects errors into the same log file, which is easy to forget and annoying to debug later if you do.
That redirect is the tell: cron itself keeps no history and tells you nothing when a job stops working. If you would rather not manage this by hand, CtrlOps Cron Jobs writes the entry for you, records every run with its full output, and sends a Slack, Telegram or webhook alert the moment one fails.
systemd timers (the modern alternative)
Timers give you better logging (via journalctl) and dependency handling than cron. A simple timer setup involves two files:
/etc/systemd/system/backup.service:
[Unit]
Description=Run backup script

[Service]
ExecStart=/usr/local/bin/backup.sh/etc/systemd/system/backup.timer:
[Unit]
Description=Run backup daily at 2AM

[Timer]
OnCalendar=*-*-* 02:00:00
Persistent=true

[Install]
WantedBy=timers.target
Enable it:
sudo systemctl enable --now backup.timer
sudo systemctl list-timers      # see all scheduled timers
Persistent=true is a nice touch - it makes sure a missed run (say, the server was down at 2 AM) gets triggered as soon as the system comes back up.
10. Storage and Disk Management
Checking and managing disk usage
lsblk                  # list block devices
df -h                   # filesystem-level usage
du -sh /* 2>/dev/null | sort -rh | head -10   # find your biggest directories
That last command is one of the most useful one-liners in a sysadmin's toolkit - it'll quickly tell you what's eating your disk space.
Logical Volume Management (LVM)
If your server uses LVM, you can resize partitions without downtime - a big advantage over fixed partitions.
sudo lvextend -L +10G /dev/mapper/vg-root
sudo resize2fs /dev/mapper/vg-root     # for ext4
sudo xfs_growfs /                       # for XFS
Clean up log bloat
Logs are a common, quiet source of disk exhaustion. logrotate handles this automatically on most distributions, but it's worth checking your configuration in /etc/logrotate.d/ to make sure old logs actually get compressed or deleted rather than piling up indefinitely.
11. Networking Basics Every Admin Should Know
ip addr show            # view network interfaces and IPs
ip route show            # view routing table
ping -c 4 google.com     # test connectivity
traceroute google.com    # trace the path packets take
ss -tulnp                # view listening ports and associated processes
dig example.com           # DNS lookup
When something "isn't working," these commands are usually your first stop: is the server even reachable, is the right port open, is DNS resolving correctly. Working through them in order saves you from chasing the wrong problem.
12. Performance Tuning
Once the basics are solid, you can start squeezing more reliability and speed out of your servers.
Check load average with uptime - a load average consistently higher than your CPU core count means the system is overloaded.
Tune swappiness if your server is swapping too aggressively:
sudo sysctl vm.swappiness=10This change is temporary and resets on reboot. To make it permanent, add vm.swappiness=10 to /etc/sysctl.conf (or a new file in /etc/sysctl.d/).
Lower values make the kernel prefer RAM over swap, which usually improves performance on servers with enough memory.
Adjust open file limits for high-traffic services (databases, web servers) in /etc/security/limits.conf, since the default limits are often too low for production workloads.
Use iostat and vmstat to spot disk I/O or memory bottlenecks:
iostat -x 1
vmstat 1
13. Troubleshooting: A Practical Checklist
When something breaks, resist the urge to randomly try fixes. Work through it methodically:
- Check the logs first:
journalctl -xeor the relevant file in/var/log/usually tells you exactly what happened. - Check resource usage: Is the disk full? Is memory exhausted?
df -handfree -htake five seconds to run. - Check the service status:
systemctl status <service>tells you if it's even running, and often shows the last error. - Check connectivity: If it's a network issue, work outward: local process, then firewall, then DNS, then external reachability.
- Check recent changes: Did a package update, config change, or deployment happen recently? Grep your shell history or deployment logs.
Keep a simple runbook (even a plain text file) documenting fixes for problems you've solved before. Future-you, debugging the same issue at 1 AM six months from now, will thank present-you.
Bottom line: An AI terminal with live server context can compress this entire checklist into a single question: "Why is my server slow?" It runs the diagnostic commands, reads the output, and surfaces the root cause - with every command shown for your approval before execution.
Why Do Linux Server Management Best Practices Matter?
If you have ever suddenly woken up at 3 AM because a server ran out of disk space, or spent a stressful afternoon explaining to your boss why a production box got compromised through an open SSH port, you already know that managing Linux servers is equal parts discipline and muscle memory.
It's not glamorous work. Nobody writes movies about the sysadmin who quietly kept 200 servers patched and backed up for five years straight. But that quiet reliability is exactly the goal.
This guide covered the practices that separate a server that "just works" from one that becomes a liability: security, updates, monitoring, backups, and a lot of the day-to-day plumbing - user accounts, permissions, firewalls, cron jobs, systemd, and troubleshooting with real commands you can run today.
Whether you are a freelance developer managing client VPS instances, a startup CTO keeping production reliable as the fleet grows, or a sysadmin responsible for hundreds of machines, these 13 Linux server management best practices apply to your stack right now. Every command in this guide is written for Ubuntu 22.04/24.04, with the RHEL/CentOS equivalents noted where they differ.
Bringing It All Together
None of this is complicated in isolation - the challenge is doing all of it, consistently, on every server you're responsible for. Good Linux server management best practices aren't a one-time setup. They're a routine.
Lock down SSH and firewalls. Keep patches current. Automate your backups and maintenance. Watch your logs and resource usage. Document what you learn along the way.
Servers that are well-managed tend to be boring, in the best possible sense - no drama, just quiet reliability. That's the goal.
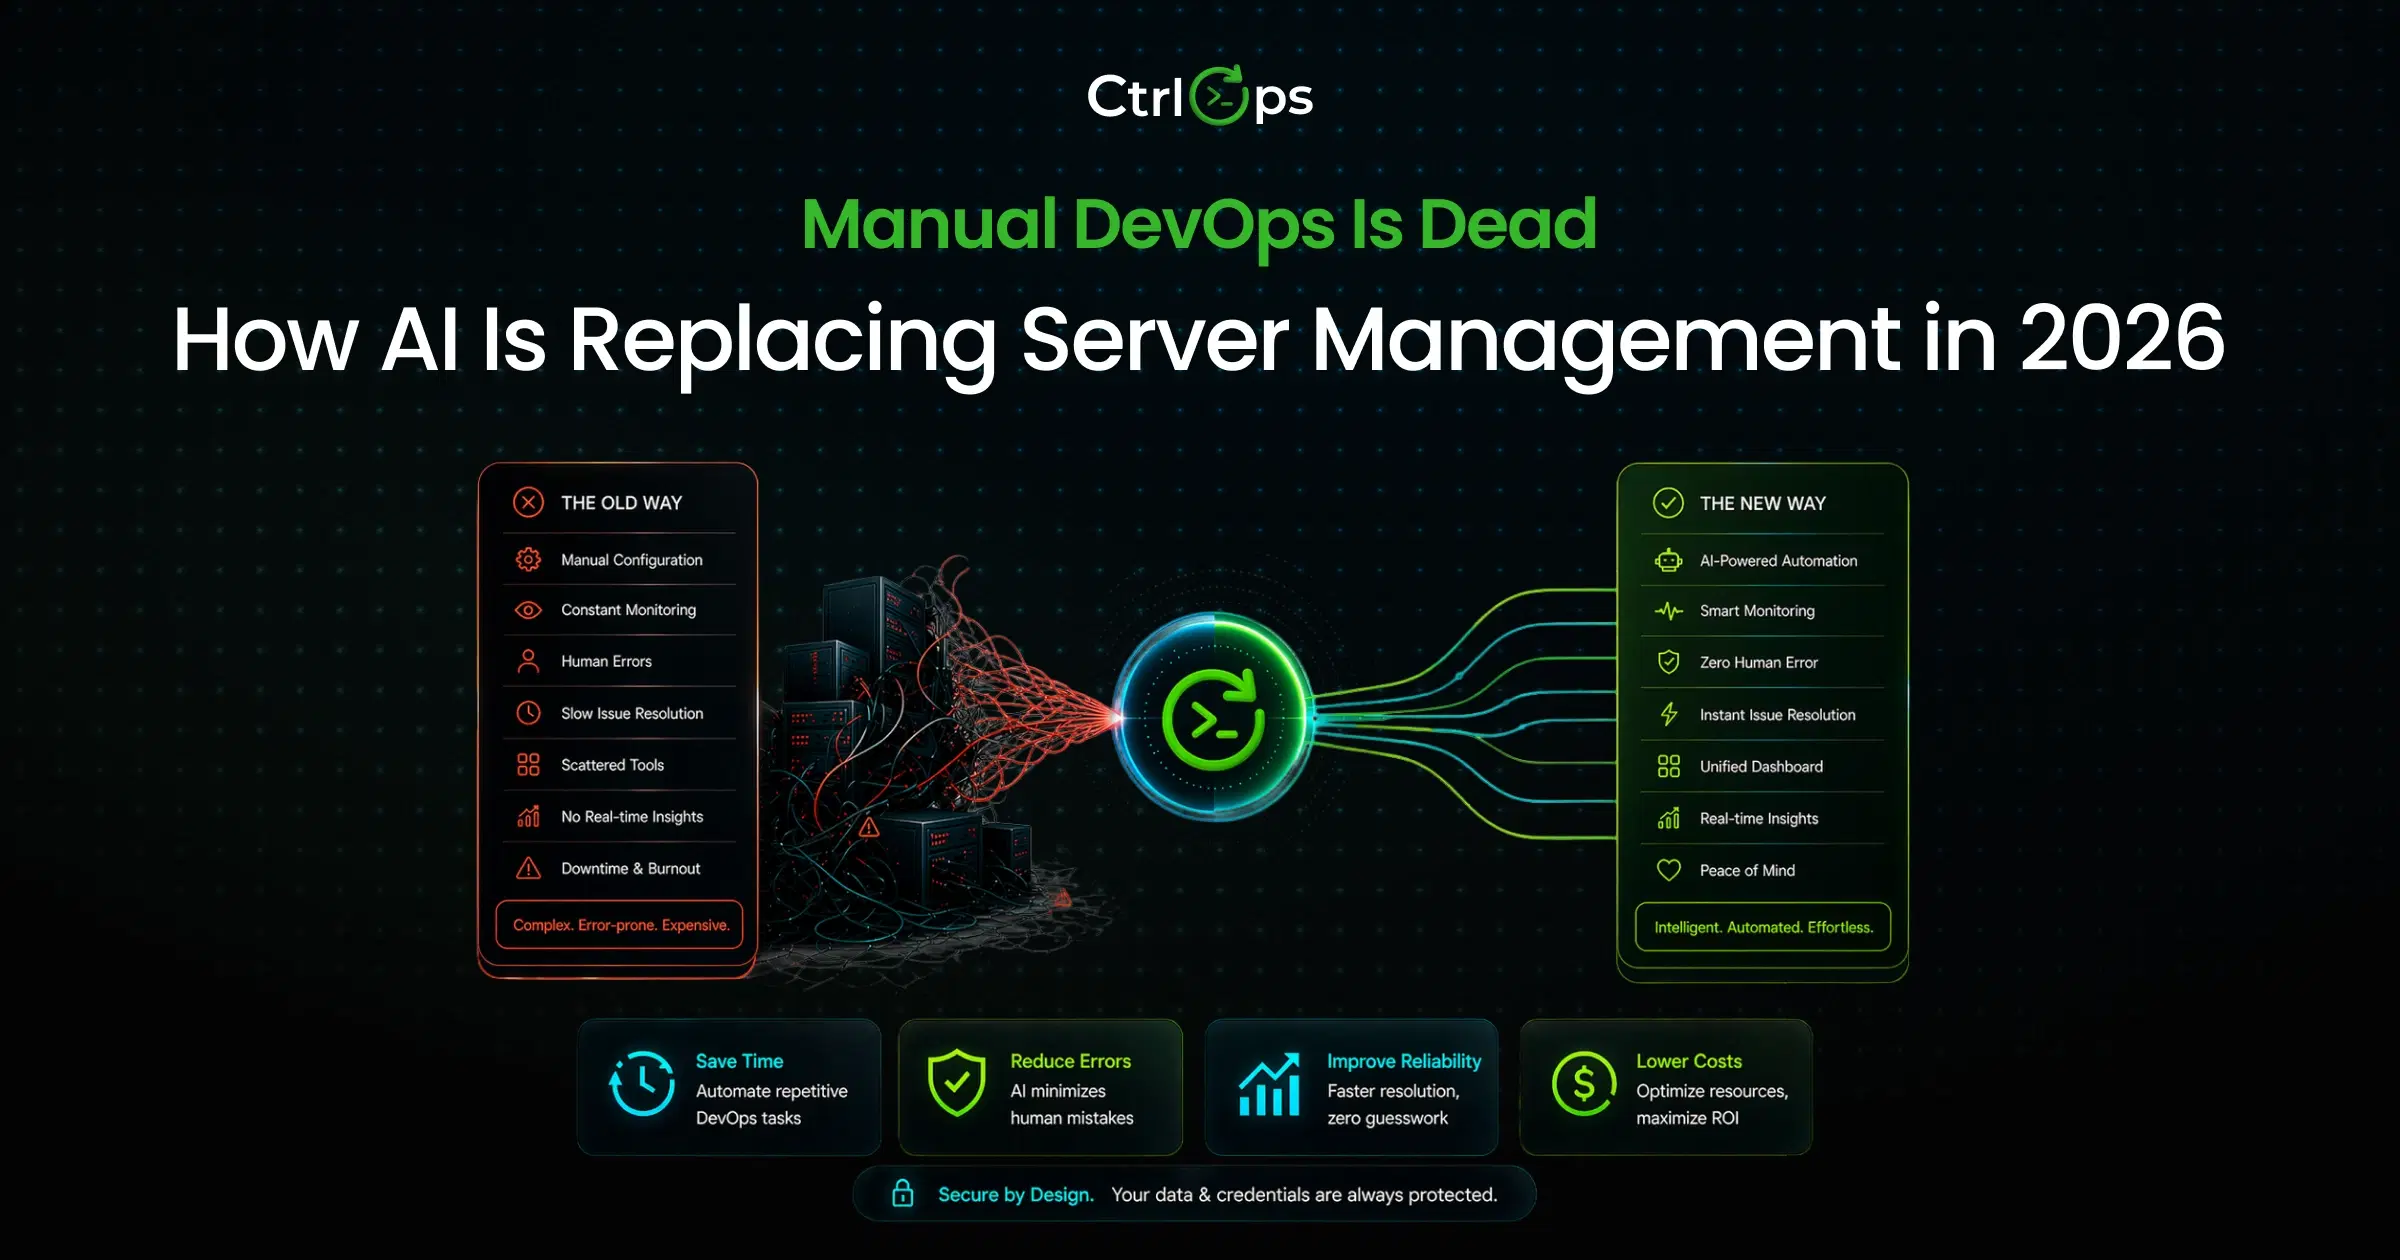
The gap between knowing these practices and actually applying them across 5, 10, or 20 servers is where most teams fall behind. Manual repetition across a growing fleet is where mistakes compound. For a practical breakdown of how to organize and automate server operations at that scale, read our guide on DevOps automation tools that actually fit small teams.
Frequently Asked Questions
The most critical practices are disabling root SSH login, switching to key-based authentication, configuring a deny-by-default firewall, automating security updates, and testing backup restores monthly. These five steps eliminate the overwhelming majority of common server compromises and data loss scenarios on any Linux distribution.
Disable root login (PermitRootLogin no), switch to ed25519 key authentication, disable password auth entirely, change the default port, use fail2ban to block brute-force attempts, and set idle timeouts with ClientAliveInterval. Test new key-based login in a separate terminal before closing your current session.
No. chmod 777 gives every user on the system full read, write, and execute access to the file. On a web server, this allows anyone to upload and run malicious scripts. Instead, identify the actual owner/group mismatch with ls -l and set the correct permissions - typically 644 for files and 755 for executable scripts.
Security patches should be applied automatically using unattended-upgrades (Ubuntu/Debian) or dnf-automatic (RHEL/CentOS). Hold off on full version upgrades until tested in staging. A patched CVE protects you immediately. A kernel upgrade that breaks your application creates a new incident.
Keep 3 copies of your data, on 2 different types of storage, with 1 copy off-site. This protects against hardware failure, ransomware, and human error like rm -rf on the wrong directory. Crucially, backups must be versioned (for example rsync with --backup-dir, or snapshot tools like Restic and Borg). A simple sync/mirror (rsync --delete) is not a backup, because it will propagate ransomware encryption or deletions to your destination on the next run. The most overlooked step: test restoring from your backup once a month. A backup you've never restored is an assumption, not a safety net.
CtrlOps is a local-first desktop application that brings SSH management, a visual file manager, infrastructure monitoring, an approval-based AI terminal, and automated backups together in a single interface. Read more about why CtrlOps was built to replace 4-5 separate tools and reduce deployment time from 30-45 minutes to under 5 minutes. It costs $7/user/month after a 1 month free trial - no credit card required.
For small teams managing under 25 servers, CtrlOps's built-in monitoring covers CPU, memory, disk, and running processes without installing or maintaining a separate stack. For teams at scale needing custom metrics, PromQL queries, and long-term data retention, Prometheus + Grafana is still the right choice. CtrlOps handles the 80% case with zero setup overhead.
Avoid full automation for production database migrations, credential rotation, server scaling or termination, and any destructive filesystem operations. These should be human-gated: automate the process, but require a human trigger and review before execution. Monitoring, backups, log rotation, and SSL renewal are safe to automate fully.
Both schedule recurring tasks. systemd timers offer better logging (via journalctl), dependency handling, and missed-run recovery (Persistent=true runs a missed task when the server comes back online). Cron is simpler to set up for basic scheduling. For production servers, systemd timers are the modern, more reliable choice.
Run sudo ss -tulnp to see every listening port and the process behind it. Cross-reference with your firewall rules (sudo ufw status or sudo firewall-cmd --list-all). Any port that's listening but not needed should be closed. Every open port is one more surface an attacker can probe.
Lock or delete their user account (using sudo usermod -L and disabling shell access with sudo usermod -s /usr/sbin/nologin, or deleting the user and their home directory entirely with sudo userdel -r), remove or back up their SSH keys from ~/.ssh/authorized_keys, and rotate any shared credentials they had access to. This should happen the same day they leave, not "when someone remembers."
No. Termius and PuTTY are SSH connection tools. They handle terminal access but don't provide infrastructure monitoring, backup scheduling, AI-assisted diagnostics, or deployment automation. For those capabilities in a single app, CtrlOps is built for that use case at $7/user/month after a 1 month free trial - no credit card required.